
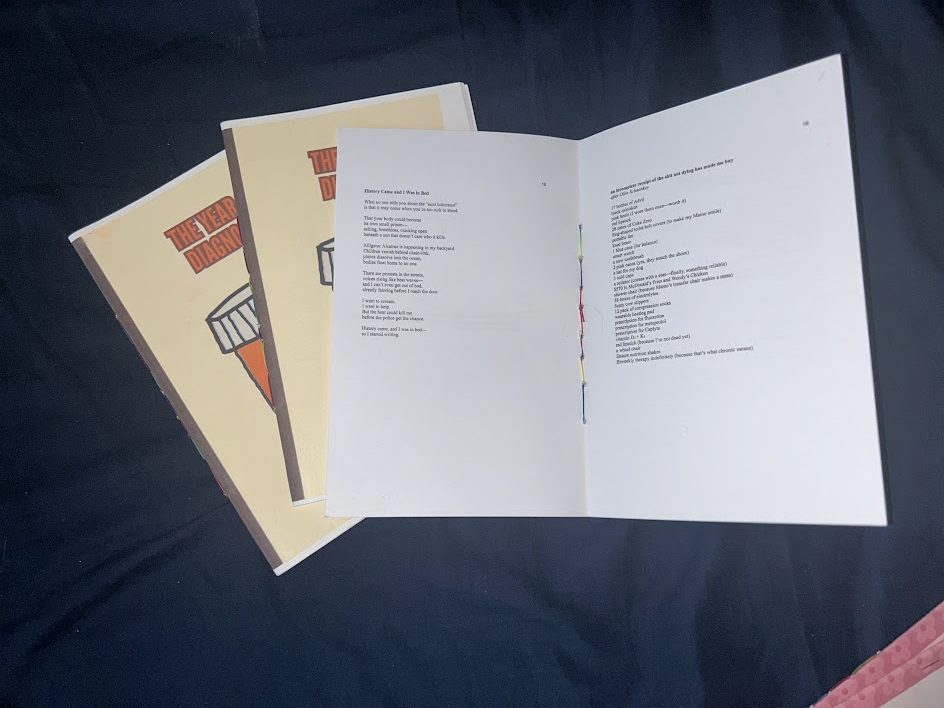
During a recent interview for Passing the Salt, poet Neil Hilborn told me something that stuck with me:
Honestly man, if you have 24 pages of poems, make a book out of it. Just have it in your bag. Having a physical object feels so nice. It doesn’t have to be a big deal; there doesn’t need to be a launch party. Just put some poems onto some paper and get them out there.
Neil Hilborn
For many writers, the idea of publishing a chapbook feels like something that happens after a press says yes. But for generations, poets have been making books themselves. Chapbooks have long been a cornerstone of independent publishing: sold at readings, traded with other writers, tucked into bookstore shelves, or simply handed to someone after a conversation.
Your first chapbook doesn’t have to be perfect.
It doesn’t need an ISBN, a publishing contract, or an elaborate launch party. Sometimes all it needs is a handful of poems you’re proud of, a printer, a few sheets of paper, and a stapler.
In this guide, I’ll walk you through the entire process of creating a simple saddle-stitched chapbook from home. We’ll cover formatting your manuscript, arranging the pages for booklet printing, assembling the finished book, and a few inexpensive ways to make it look polished.
Let’s make a book.
Step One: Set Up Your Book
Before we start printing, we need to prepare the document so the pages appear in the correct order once they’re folded into a booklet.
For this tutorial, I’ll be using Bookbinder, a free online tool that automatically rearranges your manuscript into printable booklet spreads.

Once you’ve uploaded your PDF, these are the settings I recommend for a simple chapbook:
- Paper Size: 8.5 × 11 inches
- Signature Format: Booklet
- Add Marks for Sewing: Enabled (if you plan to sew your chapbook)
- Output: Preview Output
If you’re using multiple signatures, make sure “Both aggregated & per signature files” is selected. This will generate both a complete booklet PDF and individual PDFs for each signature, making the sewing process much easier.
For most chapbooks, however, I find it easiest to stick with the Booklet setting and create a single signature.
Once you’ve selected your settings, click Preview Output.
You’ll immediately notice that the pages look completely out of order—but don’t panic! That’s exactly what you want. Bookbinder rearranges the pages so that once they’re printed, folded, and assembled, they’ll read in the correct order.

Personally, I like to print directly from the preview window, but you can also download the PDF if you’d rather save it for later.
Step Two: Print Your Chapbook
Now it’s time to print!
Before you begin, let’s talk about paper. I personally use HP Premium32 (32 lb) printer paper for the interior pages of my chapbooks. It’s thick enough to dramatically reduce show-through, giving the finished book a more professional feel, while still folding easily and feeding smoothly through most home printers. If you’re only planning to upgrade one thing, I would recommend upgrading your paper.

If your printer supports automatic double-sided (duplex) printing, simply select Print on Both Sides in your print settings and let the printer do the work.
If your printer doesn’t support automatic duplex printing (like mine), don’t worry! You can still print your chapbook manually.
There are two ways to do this:
Option 1: Print All Even Pages, Then All Odd Pages
First, print all of the even-numbered pages. Once they’ve finished printing, place the stack back into your printer’s paper tray in the correct orientation and print the odd-numbered pages on the reverse side.
This method is quicker, but it may take a little trial and error to figure out how your specific printer feeds the paper.
Option 2: Feed One Sheet at a Time (My Preferred Method)
This is the method I use.
Queue the entire chapbook to print, but instead of loading a full stack of paper, feed your printer one sheet at a time. After each side prints, flip the same sheet over and feed it back through the printer to print the reverse side before moving on to the next page.
It takes a little longer, but I find it much easier to keep everything in the correct order and avoid accidentally printing pages upside down or backwards.
No matter which method you choose, I highly recommend printing one test sheet first. Every printer feeds paper a little differently, and it’s much better to discover how yours behaves before printing the entire chapbook.


Optional Step: Design a Cover
A cover isn’t required, but it can go a long way toward making your chapbook feel like a finished book.
One of the easiest ways to create a cover is with Canva. You can find some templates for free by searching: book cover front and back. Set your design to the same dimensions as your finished chapbook, then add a title, your name, and any artwork or photography you’d like to use. If you’re keeping things simple, even a clean title with thoughtful typography can look beautiful.
I recommend printing your cover on some form of cardstock, if your printer can handle it. A heavier cover protects the pages inside and gives the chapbook a more polished feel. If cardstock isn’t an option, don’t let that stop you! Regular printer paper works just fine, especially for your first chapbook.


Remember, readers are picking up your chapbook before they read it. A simple, well-designed cover invites them to open it.
One feature I highly recommend is adding a QR code to the inside cover or back cover. Link it to your website, social media, or a Linktree so readers can easily find more of your work. If someone enjoys your chapbook, a quick scan lets them discover your other publications, upcoming readings, newsletter, or where to purchase future books.
Step Three: Bind Your Chapbook
Now it’s time to put your chapbook together!
There are several ways to bind a handmade chapbook.
Option 1: Sewing
Personally, though, I love the look and feel of a hand-sewn pamphlet stitch. It takes only a few extra minutes and gives the finished book a beautiful, handmade quality.
To sew your chapbook, you’ll need:
- An awl or pushpin to make sewing holes (optional, but helpful)
- A needle
- Waxed thread (often found in the leatherworking section of craft stores like Hobby Lobby or Michaels)
Rather than reinvent the wheel, I highly recommend following this excellent video tutorial, which demonstrates the entire binding process step by step:
📺 Simple Pamphlet Stitch Tutorial:
Don’t worry if your first attempt isn’t perfect. Handmade chapbooks have character, and every stitch gets a little neater with practice.

✦ Poet’s Toolbox Tip: Punch Your Holes While Everything Is Clipped Together
One trick I’ve picked up is to keep the folded pages and cover clamped together with binder clips while preparing to sew. This keeps everything perfectly aligned and prevents the pages from shifting.
I like to open the chapbook to the center spread, where Bookbinder has already provided sewing guide marks. Using the needle, I first press lightly from the inside until I can see a small bump forming on the outside cover. Then, I flip the chapbook over and push the needle from the outside in, following that raised bump as my guide.
I’ve found this creates a cleaner hole through the cover. If there’s any slight tearing around the hole, it stays on the inside of the chapbook where it won’t be seen, leaving the outside cover looking much cleaner.
Option 2: Staple Binding
If your chapbook is relatively thin (around 20–30 pages), you can also bind it with staples.

Simply fold your pages together, line up the spine carefully, and place two staples along the center fold. If you have a long-arm stapler, this is quick and easy. If you don’t, you can still use a regular stapler by opening it flat, stapling it into a piece of cardboard, and folding the staple legs inward by hand.
Stapled chapbooks have been a staple (pun intended) of independent publishing for decades. They’re inexpensive, durable, and perfect for readings, workshops, and sharing your work with others.
Keep in mind that your choice of paper matters. Stapling works best with thinner interior paper. If you’re printing your entire chapbook on heavy cardstock or using a particularly thick paper, the fold becomes much bulkier, making it harder to staple cleanly. In those cases, a sewn pamphlet stitch is often the better option because it handles thicker materials much more comfortably.
Step Four: Press and Flatten Your Chapbook
Your chapbook is almost finished!
After binding, the pages will naturally want to spring back open. Giving your book a little time under pressure helps sharpen the folds, flatten the spine, and gives the finished chapbook a cleaner, more professional appearance.
If you own a book press, now is the perfect time to use it. If not, don’t worry, most of us don’t!
You can easily improvise by placing your chapbook:
- Between two heavy books
- Under a stack of textbooks
- Between the mattress and box spring of your bed (Thanks to Mamo Painter for this one)
Leave it under pressure for several hours or overnight. When you take it out, you’ll notice the spine is flatter, the pages sit more neatly together, and the chapbook feels much more like a finished book.
✦ Poet’s Toolbox Tip: Burnish the Spine
I like to give the spine a quick pass by firmly rubbing along the fold with the side of something sturdy like a book edge, a bone folder, or even the handle of a spoon. Honestly, I usually use my iPhone without the case for this step.
This process, called burnishing, helps sharpen the crease, flattens the fold even further, and gives the chapbook a crisp, professional-looking spine. It’s a small step, but it makes a noticeable difference in the finished product.
Step Five: Distribute Your Awesome Chapbook!
Congratulations, you’ve just made your own chapbook.
Now comes the hardest part: letting people read it.
Chapbooks are meant to be shared. Bring a few copies to your next open mic or poetry reading. Leave one at your local coffee shop or Little Free Library (if they allow it). Trade copies with other writers. Give one to a mentor, a friend, or someone whose work inspires you.
If you’re comfortable selling your work, handmade chapbooks are also a wonderful way to support your writing. Many poets sell them at readings, festivals, or through their websites. Even charging enough to cover printing costs can help fund your next project.
Don’t forget to include your name and a way for readers to find you. I like adding a QR code to the inside cover that links directly to my website. If someone enjoys your work, they can immediately explore your other publications, sign up for your newsletter, or follow you on social media.
Most importantly, don’t wait for perfection.
Your first chapbook doesn’t need to be flawless. It doesn’t need a publishing contract, an ISBN, or a launch party. It just needs to exist.
As Neil Hilborn told me during our interview:
Honestly man, if you have 24 pages of poems, make a book out of it. Just have it in your bag. Having a physical object feels so nice. It doesn’t have to be a big deal; there doesn’t need to be a launch party. Just put some poems onto some paper and get them out there.
Neil Hilborn
So make the book. Carry it with you. Hand it to someone.You never know whose favorite poem is waiting inside.
Leave a Reply